Chandra Namaskar
If you practice yoga, you've probably already heard of the sun salutation. This sequence energizes the body. It is a good way to start a yoga session. It is an essential series in Vinyasa Yoga that you will find in almost all your sessions. However, it requires energy and strength. Elements that we don't always have... Fortunately, on these days, there are softer practices that are ideal for releasing your daily tensions and recharging your batteries. The Moon Salutation is part of this idea! You want to know its benefits, its history and how to practice it? I explain everything in this article!
When to practice the Moon Salutation? What are its benefits?
The Moon Salutation, traditionally called Chandra Namaskar, is a sequence of movements always performed in the same order. Its objective is to pay homage to the moon, which is an important landmark for yogis or, more globally, for people in search of fulfillment. It is found in many rituals since the dawn of time.
But in practice, what does it correspond to? As you surely know, the sun refers to energy and action. Thus, the Sun Salutation is a dynamic sequence, which allows the body to warm up and awaken. While the moon rather symbolizes appeasement. As we can see it at night, we consider that it regenerates our energy level, that it resources us. Thus, the Moon Salutation in yoga, rather refers to our side Yin (calm) than Yang (action). This sequence is a good way to calm us down.
Chandra Namaskar
Good news! Chandra Namaskar is more accessible than the Sun Salutation because it requires less strength and energy. Indeed, you will not have to practice the upside down dog or "Chaturanga Dandasana", the yogic pump. It is therefore an ideal sequence to practice at the end of the day, when you have less energy or if you are just starting yoga.
Thus, the Moon Salutation is a very gentle practice that focuses on flexibility and the search for balance. It works the opening of the hips, the shoulders, and allows you to mobilize the whole body in a soft way and without forcing. It aims to help us develop our intuition and our feminine energy. That said, it can be practiced as much by women as by men. This sequence can be practiced during the full moon or the new moon. On the other hand, it should be included in your sessions preferably in the evening every other day of the month. Indeed, this greeting soothes the tensions of the day and prepares the body for sleep.

History of the Moon Salutation
The origin of the Moon Salutation dates back to 1969. Indeed, it was approached for the first time by Swami Satyananda Saraswati in his work "Asana, Pranayama, Mudra, Bandha". In this version, it was very similar to the Salutation to the Sun, although it is supplemented by lateral stretching postures also called crescent moon. Today, another version of the Moon Salutation has been adopted which includes the Goddess (Utkata Konasana) posture. However, you can find many practices of "Moon Salutation" with many other movements or sequences.
Today, I will therefore present to you, step by step, the most common Moon Salutation. This sequence has, in my opinion, something very fluid that is pleasant to practice. You will find, for example, many hip openings. The mobility of this area of the body has the gift of reconnecting us to our feminine energy. Moreover, during this sequence, the whole body moves smoothly in a natural rhythm. This has a truly positive effect on body and mind.
How does the Moon Salutation take place, step by step?
Tadasana: To practice Chankra Namaskar, place yourself facing one side of your mat and not facing the front of your mat as usual. Begin in a standing position with your legs hip width apart.
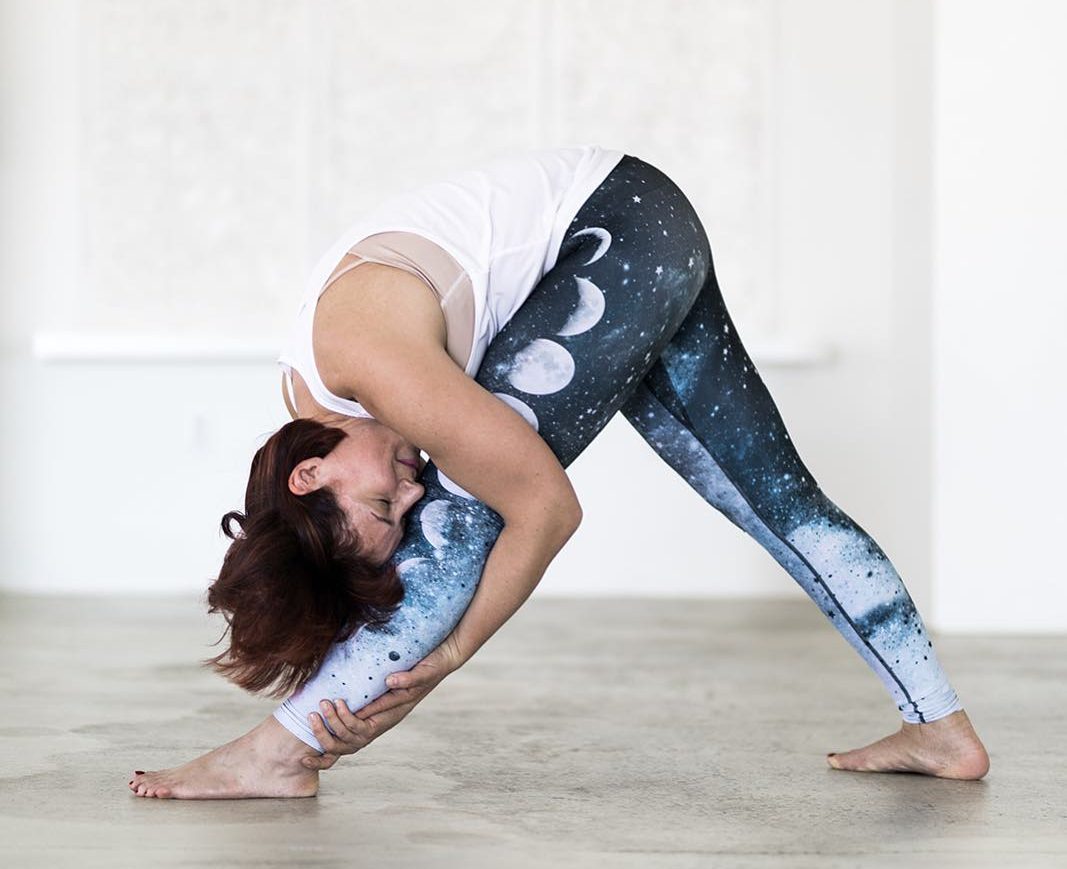
Crescent Moon: As you breathe in, raise both arms up to the sky, with your fingertips touching each other. As you exhale, stretch the entire left side of your body, moving your chest and arms to the right. Return to the center and inhale. As you exhale, do the same on the left: tilt your shoulders and arms to the left to stretch the entire right side. Return to the center quietly on inhalation. And when exhaling, release both hands towards the ground, placing them on each side of the chest. Now take a big step to the left.
Goddess posture: Place both feet pointing to each side of your mat. As you breathe in, raise your arms to the sky. And on exhaling, bend your elbows to place your arms in a candlestick position, while bending your knees slightly. As much as possible, your knees should not exceed your ankles. However, you can spread your legs a little further apart if this is complicated. Inhale and exhale here.
The Moon Salutation
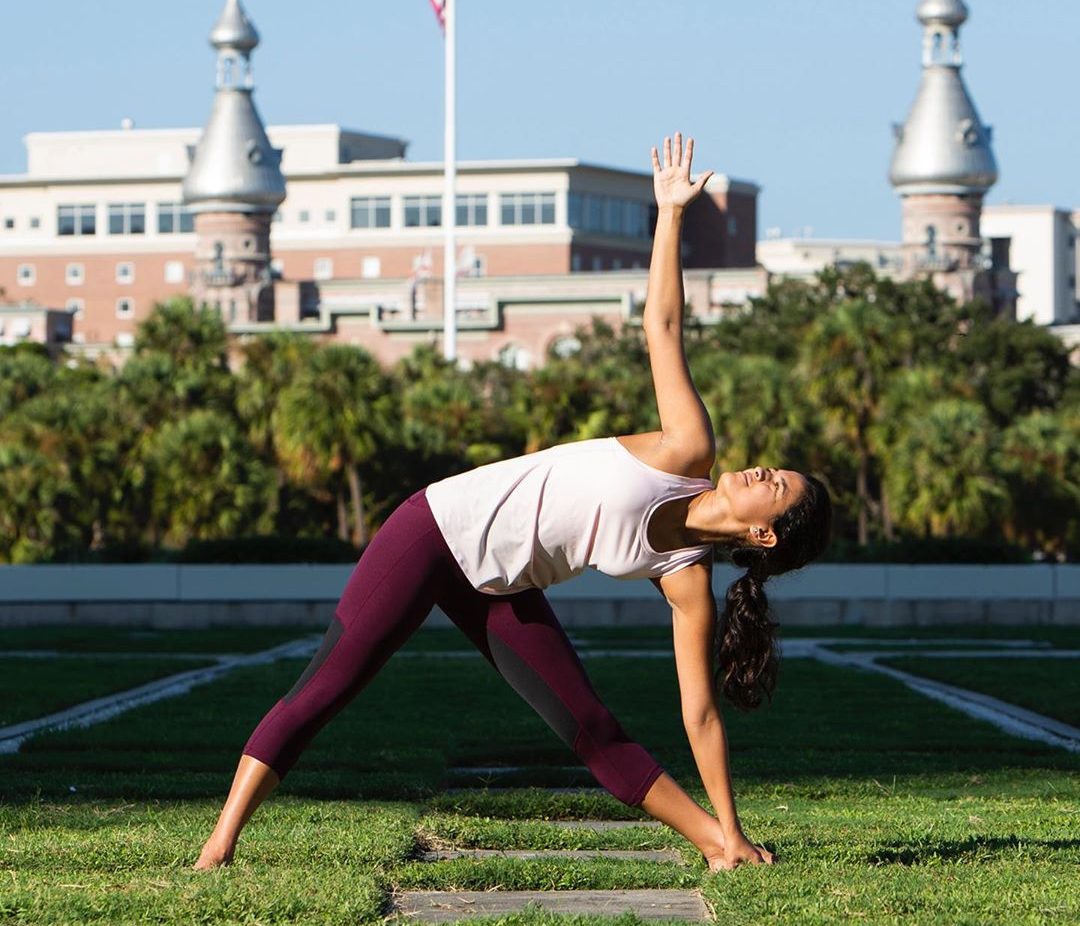
Triangle posture: Next, straighten your legs again and place your outstretched arms on the line of your shoulders. Here, your right foot comes to be placed at 45° compared to the carpet. Your left foot is looking forward and parallel to the mat. Both arms are always stretched out on each side of the bust, aligned with your shoulders. Look forward (to the left). As you breathe in, bring your right arm as far forward as possible, without moving your legs. When exhaling, place your right arm toward your right foot or leg in the triangle posture. Your left arm is stretched out toward the sky. Look up to the sky. If this is difficult for you, you can use a brick to practice this posture. Inhale and exhale here. Then straighten up.
Pyramid Posture: Next, draw a half circle with your right arm to bring it to your left arm. Both hands are on each side of your left leg (on the floor or on your left leg). Bring the right hip towards the front of the mat, the right heel comes off slightly. Turn towards the front of the mat. Inhale, look towards the horizon and exhale, release the forehead towards the stretched left leg. Both hands come to rest on the floor on each side of the left leg.
Low Lunge: From here, put your right knee on the floor at the back of the mat. The right foot rests completely on the floor. The left leg is now bent. Inhale, raise your arms up to the sky, bend your chest slightly backwards. The gaze goes to the sky. When exhaling, put both hands to the right of the front foot (important to understand the rest).
Hip opening
From there, move both hands gently toward the middle of the mat, while opening the right hip. The right leg rotates outward. The right toe points up to the sky and the heel is planted in the ground. You can lift the left heel off the floor for ease. Open the left hip outward. The right leg is extended. Breathe in here. Then move to the other side with your hands. Lift the buttocks and bring the weight of the body to the right. The left leg is now straight, the toes pointing up to the sky, the left heel is in the ground. While the right leg is bent, heel in the ground or slightly lifted off. Both hands are placed in front of the pelvis, on the mat.
Low lunge: Next, we will reproduce the low lunge on the other side. So we change the direction of the carpet. When exhaling, we replace the two hands on each side of the right foot, the left knee is placed on the ground. The right foot is flat, placed at the front of the mat. At the inspiration, raise your arms towards the sky, the bust goes slightly backwards, the glance goes towards the sky. When exhaling, replace both hands on each side of the right foot. Inhale here.
Pyramid Pose: Exhale, lift the left leg off the ground, stretch the right leg. Inhale, look forward. As you exhale, both hands on each side of the right foot, forehead goes towards the ground. Inhale, straighten up, place your left foot at 45 degrees. Then repeat the triangle posture on that side. The left arm goes up towards the sky.
Posture of the goddess: One rises by contracting the abdominal muscles. Replace your feet for the posture of the goddess: each one points towards a side of the carpet. At the inspiration, raise your arms towards the sky and at the exhalation place your arms like candlesticks by bending your elbows. Gently bend your knees. Take a deep breath in and out here. Then straighten your legs and place your outstretched arms on either side of your shoulders, on the same line as the floor.
Crescent Moon Pose: Take a step to bring your feet back to hip width. From here, as you breathe in, move your feet up to the sky again, fingertips together. Exhale to the right, the left side stretches. Then come back to the center. Finally, exhale to the left to stretch the right side. And return to Tadasana.
You are now ready to practice the Moon Salutation at the next Full Moon or New Moon. What benefits did you feel during this sequence? Do not hesitate to send me your feedback in the comments section. Finally, this set of movements is certainly a little less known, but just as interesting and beneficial as Surya Namaskar in my opinion. And you, what do you think about it?