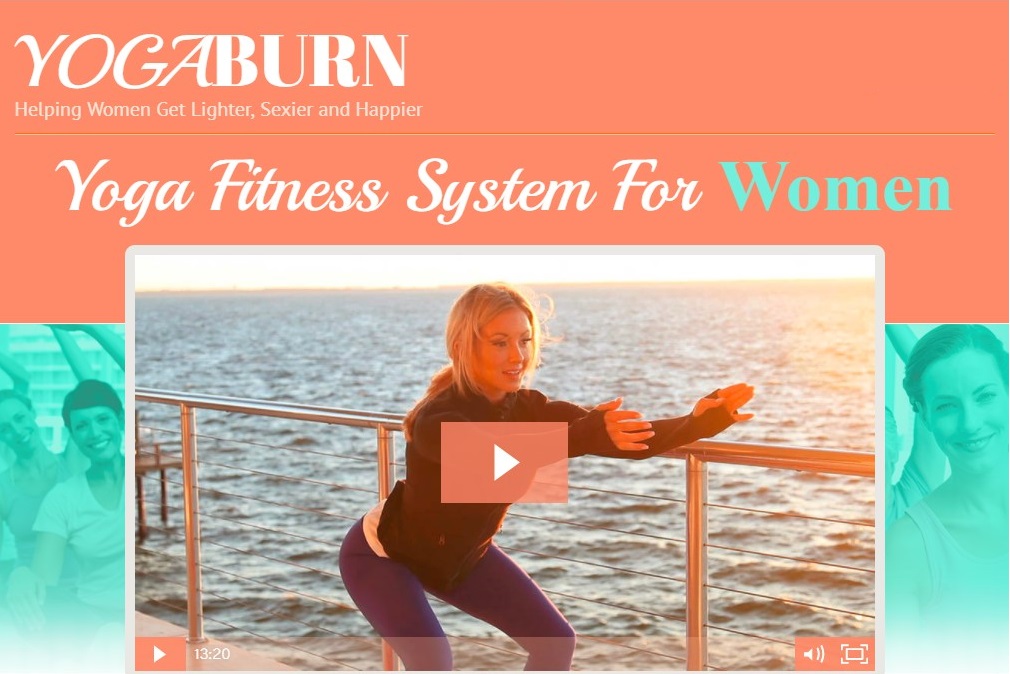
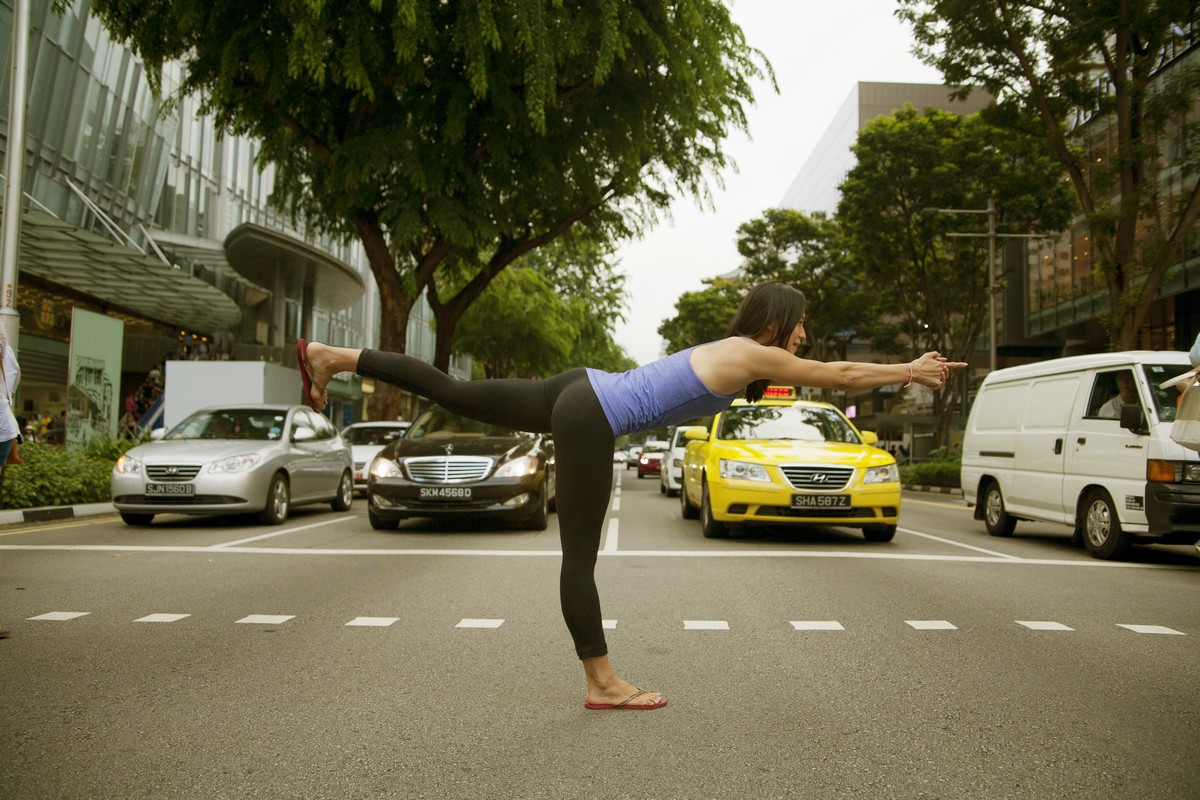
13 yoga positions to practice at home
When I took my first yoga class, I discovered a new world. I know, you think I'm going to say the same thing about yoga: "Stress is gone as soon as you lift your buttocks up", "The chakras line up as soon as you step on the mat". But no, personally, I must admit that I didn't immediately feel these benefits... The first day, I discovered the dark world of yoga positions.
Yes, my first yoga class reminded me of my Twister years. Do you remember? That game where you had to twist yourself around on a colorful mat? If you've never set foot in a class, you'll see, your first time will certainly remind you of those dark moments of solitude, laughter and gesticulation.
I spent an hour wondering, "What could be behind the upside down dog and the pigeon? How can I put my foot in my hands? Can the human body really do that? ». That reminds you of your situation today? Then it is surely time for you to desacralize yogic postures.
Yoga positions to start at home
Take a deep breath and embark with me on a selection of 13 yoga positions to practice at home, at your own pace. I remember that when I first started yoga, the more precise the explanations were, the easier it was for me to make the postures my own. So, as you will see, I did not spare words in this article.
After this reading, you will have all the cards in hand to practice the basic yoga postures without getting hurt. Sure, you won't necessarily become an expert on the feet behind your head in the blink of an eye, but at least you'll understand the process, alignment and balance you need to have when performing the most common yoga postures. And that's much more important for your practice!
Are you ready to discover some yoga moves? Then, release all your tensions, put on your leggings, unfold your mat... Let's go for explanations!
The dog upside down, Adho Mukha Svanasana
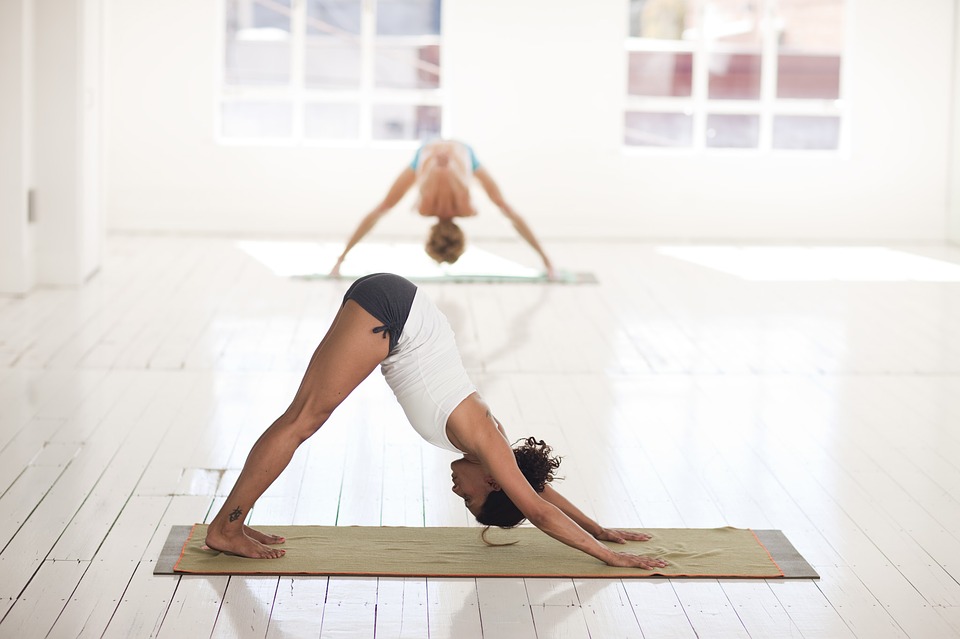
I can still hear my yoga teacher say, "The dog upside down is a resting posture. What is it? I felt my wrists getting warm. My legs were pulling as if they wanted to get bigger (and believe me, it was about time it stopped). My mind kept repeating, "It's hard, but how hard it is! ». You've been starting yoga for a few days? Then don't worry, there are ways to enjoy the upside down dog posture. But you still need to know how to practice this yoga position.
On all fours on your mat, place your legs hip width apart. The shoulders are under the wrists. Place your fingers spread out on the mat, if possible so that your two index fingers form the number eleven in front of you. Inhale in this position. And when you exhale, plant your toes in the ground, take off your knees and push your hips backwards. Here, keep your back straight, in line with your arms. Lengthen the nape of the neck, lift the shoulders away from the ears.
Different variations of the dog upside down. You now have two options. The first is to keep your stomach close to your thighs and your knees bent. The second, which will be for more advanced yogis, is to stretch your legs. If possible, you can also put the soles of your feet on the ground. If this is not possible, it is better to have a straight back and slightly bent legs than straight legs and a round back. The round back is the ultimate enemy of the yoga figure.
The purpose of the head down yoga position is to stretch the back and open the shoulders. To loosen the legs, during the first upside down dog of your session, you can bend the right and left leg alternately, before returning to the static yoga posture. Take 5 full breaths here. So, not so bad, right?
The sitting clamp, Pashimottanasana
In a sitting position, with your back straight, extend your legs in front of you. You can place a brick under your buttocks so you don't go backwards. It is also advisable to lift the back of the buttocks with your hands to make sure you are sitting properly. The legs are toned and the feet are flexed. That is to say that they are contracted so that the toes look up to the sky (see photo). As you breathe in, grow up, back straight, arms raised to the sky. And on exhalation, dive forward. The arms will try to reach your thighs, calves or feet according to your flexibility.
Here, it is the belly that tries to touch the thighs and not the hands that try at all costs to reach the ankles or the feet. This difference allows you to keep your back as straight as possible. Stretching is done little by little, without forcing. Over the course of the sessions, you can go further in the posture, while keeping your back straight.
You can tuck in your stomach to gain a few centimeters (the ego will say that it's always that way) and of course, you can use a strap for this posture. Place it on each side of your hands and pass it under the soles of your feet. This will stretch the back of the legs, while keeping the back length and a straight spine. The gaze is directed towards the big toes or straight ahead.
The standing clamp, Uttanasana
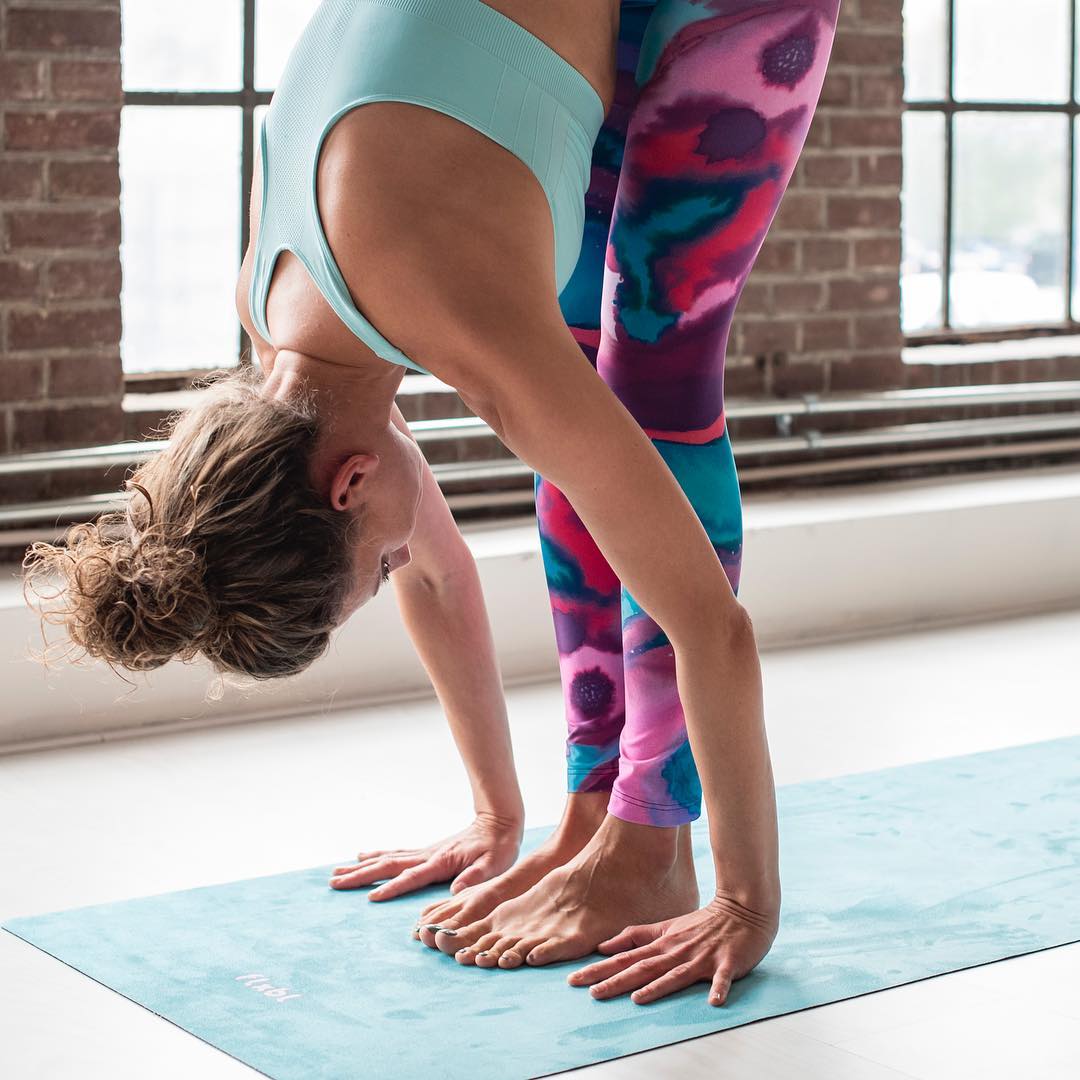
This yoga posture is very common, as it is found several times in the sun salutation. Thus, the principle is quite similar to the yoga figure of the sitting clamp. The difference lies in the fact that it is performed standing, as its name suggests.
To perform it, place yourself at the front of your mat, feet together, on the same line. As you inhale, you will seek energy by opening your arms on each side, and as you exhale, dive forward. Here we try to place your hands on your thighs, ankles or on the floor according to your level of flexibility. Don't panic however, practice allows you to quickly become more flexible in this position. You will notice that after a few repetitions of the greetings in the sun, you will gain a few centimeters of flexibility at the back of the legs.
In this yoga posture, remember to keep your back long and straight. The goal is not to make your back round so that you can put your hands on the ground at all costs, but to give the feeling that your stomach wants to lie down on your thighs. This causes a rotation of the pelvis and stretches the back of the legs. It is this stretching that you are looking for with the Uttanasana yoga posture.
The mountain, Tadasana
Tadasana is a yoga posture for beginners par excellence. It seems very simple to perform, but has many principles that improve body awareness and balance. Standing at the front of your mat, place your feet next to each other. If possible, the big toes should be in contact, the heels slightly apart. Lift the toes up and rest them slowly on the floor to check for tension.
Swing back and forth to balance the weight of the body on your feet and then stop. Return to the center with the body weight evenly distributed on each foot. The pelvis is facing forward (the opposite of a curve). Here, extend your arms on each side of your bust, hands are facing the floor, and palms are facing the front of the room.
Pull the top of the solar plexus towards the ceiling, keeping a distance between the neck and the shoulders. The shoulder blades are away from the ears and gently close together in the middle of the back. Pay attention to your head. Your chin should be parallel to the ground. Your jaw is relaxed, the muscles of your face and tongue are relaxed. Breathe here completely several times. You may lack stability in this posture, so you can move your feet slightly apart.
Warrior I, Virabhadrasana I
The warrior yoga posture is often referred to as the "pacifist warrior" posture. But in all honesty, I think he should consider learning how to defend himself in the face of the anger of the thousands of yogis who rumble against him (or at least against one of his three versions). This warrior is not so easy, here is how to approach him in his first version.
At the front of your mat, place the two feet next to each other. Take a big step backwards with your left leg. Place your left foot on the same line as your right foot, with your heel tucked in. The toes of the left foot face outward from the mat. The left heel is well anchored in the ground and does not rise in the rest of the posture (at least, that's what you're trying to do).
Bend your right leg in front of you, making sure that your right ankle is well below your right knee. If the knee is further forward, place your foot a little more forward on your mat. Once you have achieved the leg position, raise your arms up to the sky on either side of your ears and try to join your hands together. Whether your hands are touching or not, remember to place your shoulders away from your ears. Your collarbones are pointing towards the ground. Take a few breaths here. Then switch sides as you enter the yoga posture by the same path.
Warrior II, Virabhadrasana II
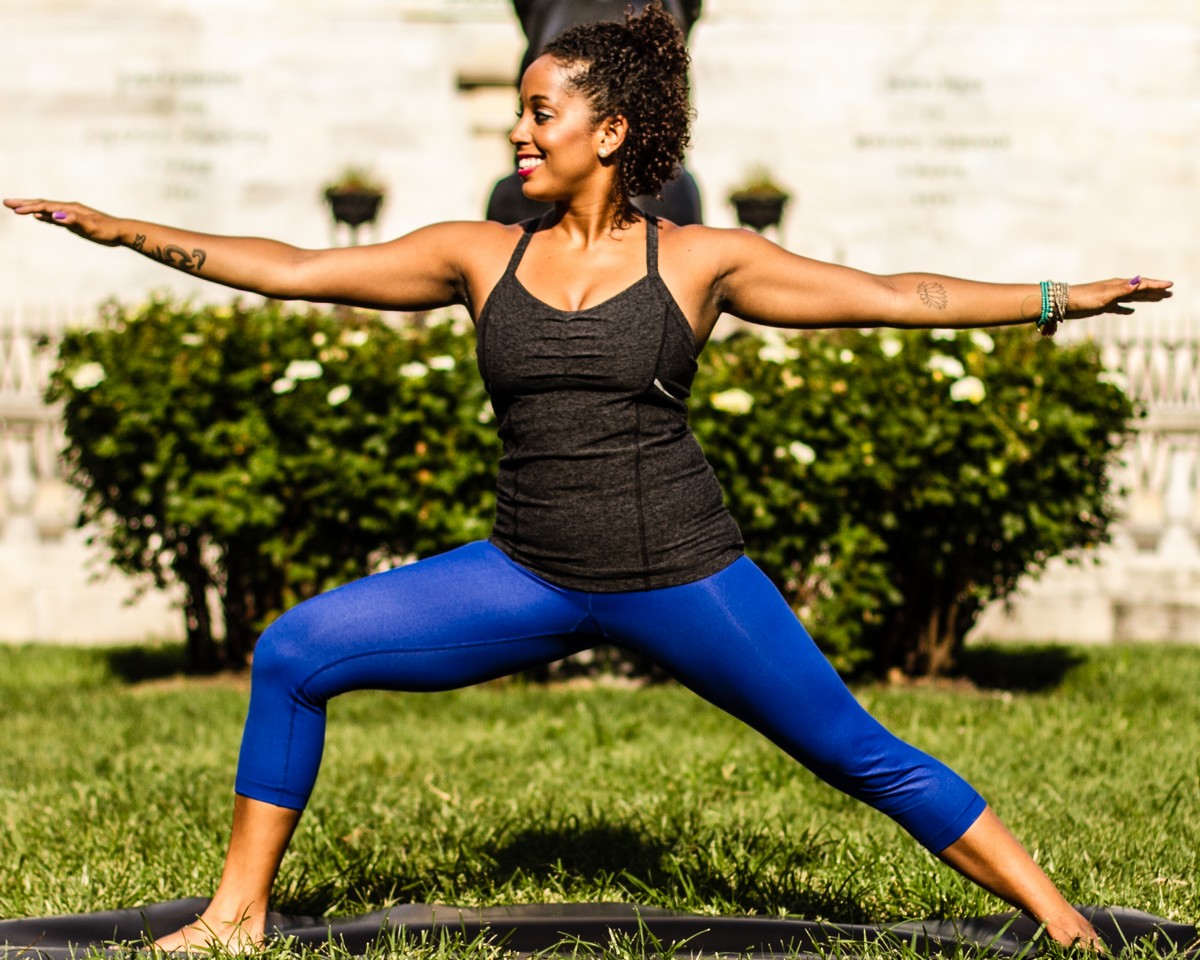
The Warrior II yoga position is not the easiest way to start. But thanks to it, you will be able to see the progress in your practice. It mobilizes all the muscles of the body, which often makes it a posture appreciated by yogis.
Repeat the Warrior I yoga position. To train Warrior II, the right leg in front is always bent. Pivot the tip of your left foot towards the back of the mat to open it perpendicular to the right foot. This is like drawing a line from your right foot to the middle of your left foot. This movement allows you to open your right thigh and hip to the side. The pelvis and lower back go forward.
The arms move away from each side of the bust and come to be on the same line in line with the shoulders. Your face is turned forward, your gaze is set far away towards the middle finger of your right hand. With a head movement, check that the left arm is placed on the same line as the right arm. Your hands are flat, palms facing the ground. Your shoulders are relaxed so that the neck remains clear. Take a moment to breathe here and feel the parts of the body working in this posture.
Warrior III, Virabhadrasana III
To practice the yoga figure of Warrior III, come and place your Warrior I, right leg in front. From there, turn the left foot so that it is in alignment with the right foot. Normally, the heel lifts off the ground. The toes of the left foot are turned towards the front of the mat. Once stable on your legs, your arms come up in the air, on each side of your ears. Unlike Warrior I, your hands do not touch, palms are turned inward. Your shoulders are well relaxed. You are here in the high lunge yoga posture, Utthita Ashwa Sanchalanasana.
From this position, join your hands in front of your heart and begin to place your weight on your right ankle with your left heel slightly off the ground. Make sure that in this movement, your right leg unfolds completely. Then return to the runner's original position and start again. When you feel ready, on an exhalation, extend your right leg and plunge your chest forward, keeping your back as straight as possible. The left leg accompanies the movement and stands up in turn. It is stretched backwards, the foot is flexed and the hip remains well closed. That is to say that it does not rise to the left side, it remains in line with the pelvis.

The yogi pump, Chaturanga Dandasana
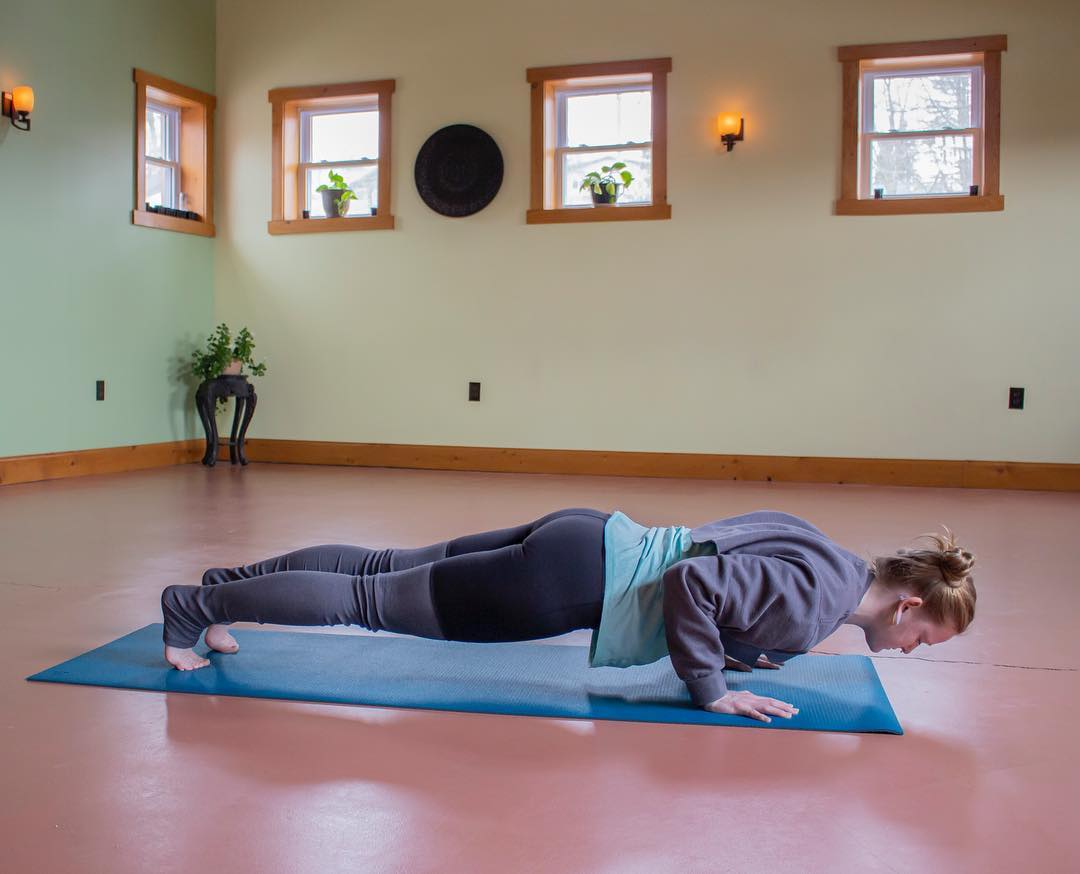
This yoga position has several variations. I prefer to focus here on the Chaturanga Dandasana position for beginners, which is performed kneeling on the ground. This will allow you to understand this posture without hurting yourself at home. The complete Chaturanga Dandasana yoga posture, with stretched legs (photo), engages the abdominals, the back and the strength in the arms. It is therefore better to have the look of a teacher to practice it the first time. But don't worry, you won't regret it very much in this ranking, once you get to know it. Personally, this posture is still my weak point after years of practice...
Tips for performing the Chaturanga Dandasana yoga figureLet's learn a simpler variation of this yoga posture. On all fours on your mat, position your legs at hip width. Take a moment here to check that your hands are positioned directly under your shoulders. Your knees are positioned on the mat under your hips. From this four-legged position, plant your toes on the floor, move your feet back slightly and raise your knees to the sky.
While keeping your back straight, come and position yourself on the board. The buttocks should not be too high or too low, but stay in line with your back. When exhaling, put your knees on the ground but keep your toes planted in the ground. While keeping your arms as close to your body as possible, bend your elbows while bringing your chest towards the ground. The elbows are well glued to the bust during the descent and do not spread out to the sides (see photo). The gaze goes towards the front of the mat and the chin is gently planted in the ground.
For information, you will certainly do this posture many times in a Vinyasa or Ashtanga yoga class. A great way to understand that yoga is also a sport activity.
The triangle, Utthita Trikonasana

Take the Warrior II yoga position. Place your bent right leg at the front of the mat and your left leg at the back. As in Warrior 2, the left foot is perpendicular to the right foot. If you are a beginner, place a brick at the front of your mat, inside your right foot (in front of the right hand of the person in the picture).
From here, to perform the triangle yoga position, extend your right leg. Then, stretch your right arm as far as possible in front of you, while staying on a line. Your bust accompanies the forward movement of your right arm. Feel the stretch above your left hip, this is what you are looking for. From there, use the brick to gently rest the fingertips of your right hand on the floor, inside your right foot. The left arm goes towards the sky and forms a line with the right arm.
The objective of this posture is to open the left hip to the side and open the left shoulder outward. It is therefore necessary to avoid crashing on the right leg.
If the brick seems too far to start, the back of the right hand can be placed on the right knee. The important thing in this yoga figure is to keep a nice opening in the bust. So you don't have to put your hand as low as possible. The spine should be parallel to the ground and the whole left side of the body is stretched.
A common mistake is to put your right hand on the leg with the full weight of your body. For a well-performed yoga posture, you should be able to remove and reinsert your hand on the floor while keeping the same position and alignment with the rest of your body.
The pigeon, Eka Pada Rajakapotasana
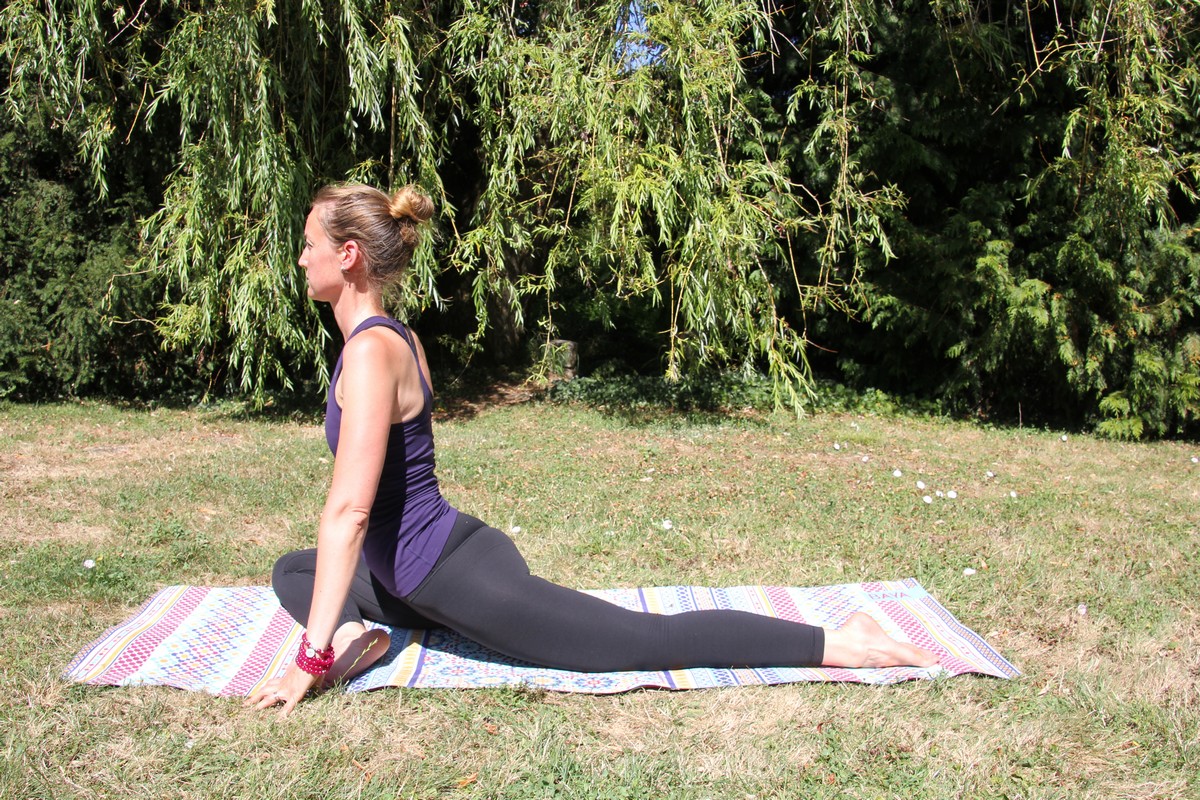
Ornithophobes, let's hang on! This yoga posture has more style than its name suggests. To achieve it, stand on all fours on your mat. Slide your right knee forward with your shin against the mat. Bring your right ankle to your left hip. Now extend your left leg back and place your thigh on the floor. Notice if your right ankle is still well below your left hip. The right buttock is relaxed on the floor. Place both hands on either side of the legs, in the shape of an inverted bowl. The fingers are gripping the floor and the palms are raised (photo). Use the support of your hands on each side to straighten your back and bust. Open the solar plexus forward and upward. The head is lying down and the gaze is turned straight forward.
For a variation of this yoga position, you can also lie down on the floor as you exhale. This, leaving your hands where they are and bending your elbows. Then, place both hands on top of each other in front of your head to let your forehead rest on it. This variation allows you to open your hip a little more. Breathe calmly, don't go beyond your limits and of course, don't forget to do the posture on the other side.
The dog head up, Urdhva Mukha Svanasana
Don't worry, this yoga posture is easier to do than to say! The head up dog posture requires a great back stretch. It is therefore better to reach it in several steps.
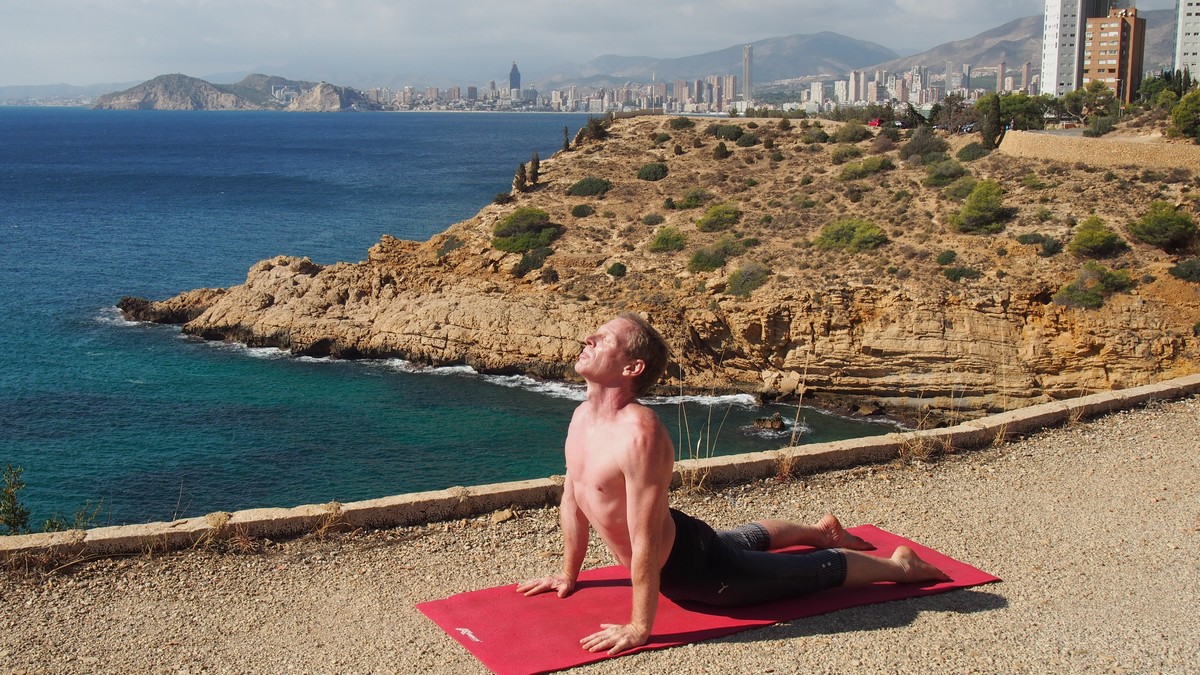
Start with the posture of the cobra, Bhujangasana. Lying on your belly on your mat, hands flat on each side of the shoulders, the front of the legs are relaxed on the floor. The legs are squeezed together without tension. Using the pressure of your hands on the floor, as you inhale, gradually raise your head and chest by rotating your shoulders backwards to stretch your upper back. The elbows are always bent, well glued to the rest of the body, they do not sag outward. The head is away from the shoulders, the neck is extended, the gaze is carried forward. Stay here for a breath, then return to a lying position on your stomach. Repeat the cobra yoga posture once more if you wish.
Next, let's move on to the yoga posture of the dog head up, which looks very much like him. In the same position on the floor, with your belly on the mat, your hands are placed in the same place as for the cobra. This time, on inspiration, you will try to stretch your arms, chest and head to stretch the whole front of the body in the posture. The legs are stretched, sheathed and accompany the movement of the hips as they rise from the ground. The sheathed legs prevent the entire weight of the body from being carried on the wrists. The goal here is really to achieve an upper body extension. Next, gently rest your hips on the floor, place the backs of your feet on the mat and slowly move into the dog's yoga position upside down, tilting the body weight backwards.
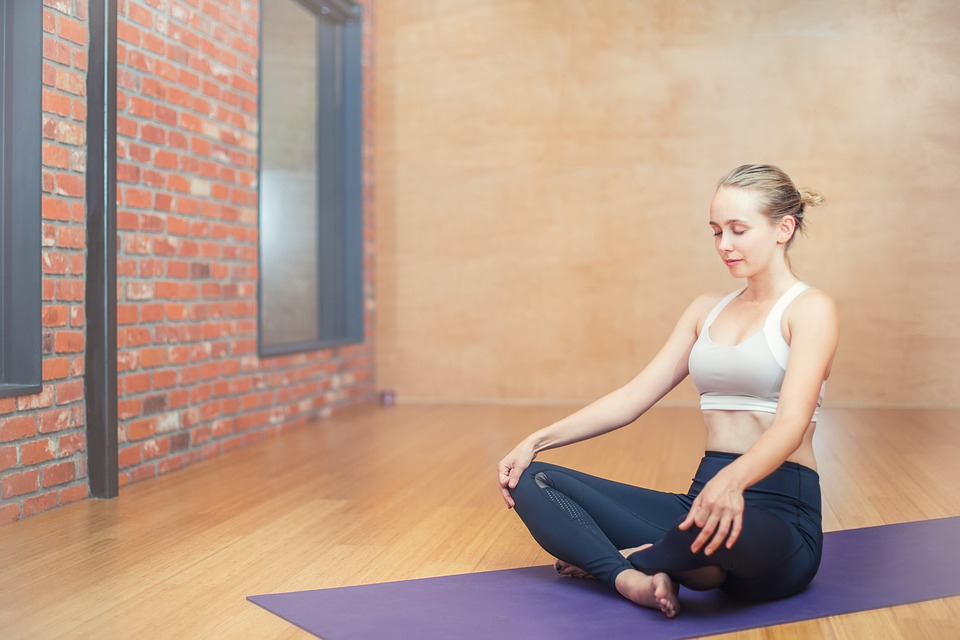
The resting yoga positions
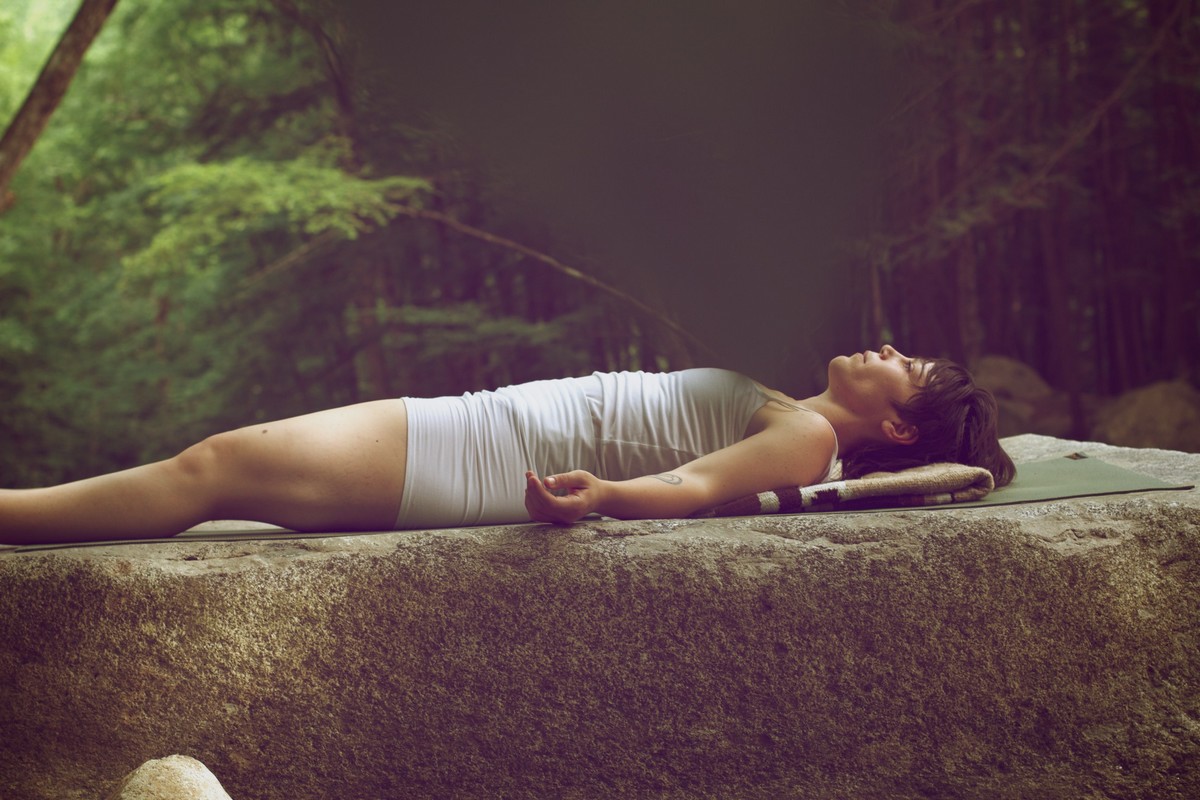
You know this posture, it is the one you take every night at bedtime. But deep down, does it really look like her? Well, not quite, because Shavasana's yoga posture is not meant to make you fall asleep, it's a relaxation posture. It allows you to completely relax your body and mind at the end of your yoga session. Although one is often in a hurry to get on with one's life after a series of yoga postures, the moment of relaxation is not to be neglected. It allows the body to memorize the work done. Moreover, it is undoubtedly thanks to this moment that the benefits of the session will be so numerous when you return home.
To put it in place, lie down on your mat, lying on your back. Your legs are a little wider apart than the width of your hips, your back and head are in the same alignment, and your arms open to the side. This posture is very simple, but it confronts us with our difficulty in remaining still for a few minutes. Initially, your thoughts will certainly bubble up in this moment of relaxation that you allow yourself. This is completely normal. Don't feel guilty. Gradually return to your body completely relaxed after these few yoga positions. During this time, focus your attention on your breath, your body, music or the words of your yoga teacher.
Posture of the child, Balasana
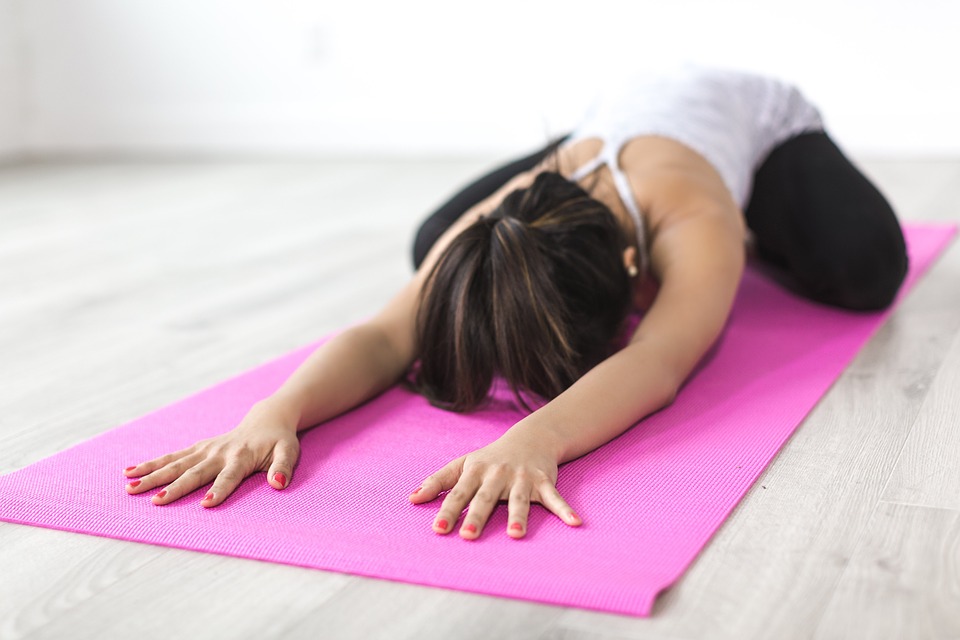
This yoga posture is ideal for resting during the practice (which can be very active, believe me). It can be practiced regularly during a yoga session, after a series of intense postures or to counterbalance a position that works the back for example. You can also take the child's posture at any time during your session, at home or in class, when you feel tired.
You don't know it yet, but this yoga posture will quickly become your favorite. So I'll leave you to do the introductions quietly... Balasana, this is the beginner's yoga reader. Dear reader, here is the yoga posture that will save absolutely all your yoga sessions. You will even regret not being able to take the child's posture to press pause anytime in your daily life. Traffic jams? Hop Balasana! A violent argument? Let's move on to Balasana. There is no more your size in stock? Balasana. That would be too beautiful!
To place yourself in the child's posture, get on your knees, buttocks on your heels. Place the top of the skull as close as possible to your knees and bend down so that your stomach rests on your thighs. The arms bend back along the legs.
There are many variations of this yoga posture. When you like it, you don't count. For example, you can also stand on your knees, your thighs on your heels and open your thighs slightly. Place your arms as far in front of you as possible, with the palms of your hands flat on the floor. Then let your stomach rest between your legs, relax your back completely and let your shoulders open. Return to your breathing. This yoga posture is called the swan or pulled child (photo). It helps release tension in the back and is also a good resting posture. So what do you think of this posture?